A simple how-to for making a Raspberry Pi computer take pictures at specified times and uploading them
Background
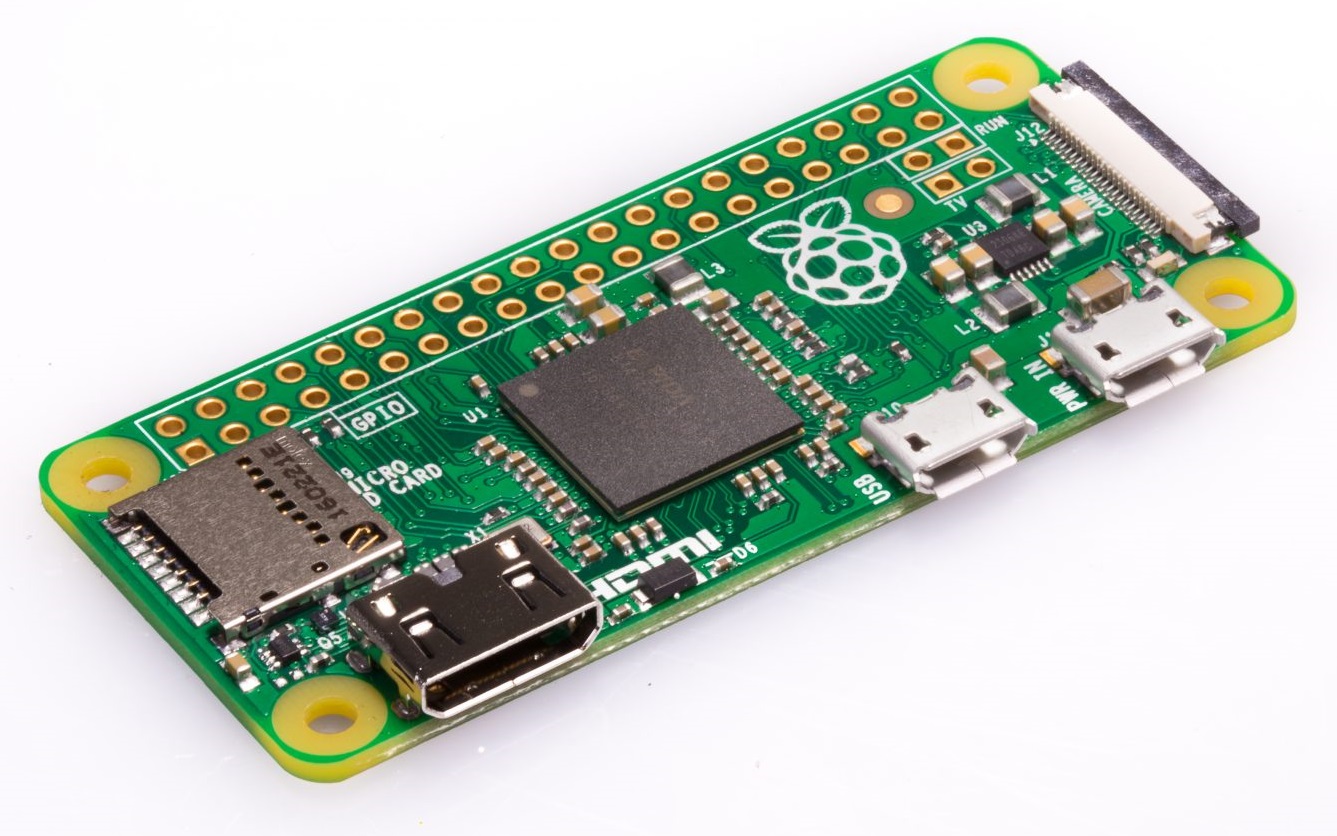
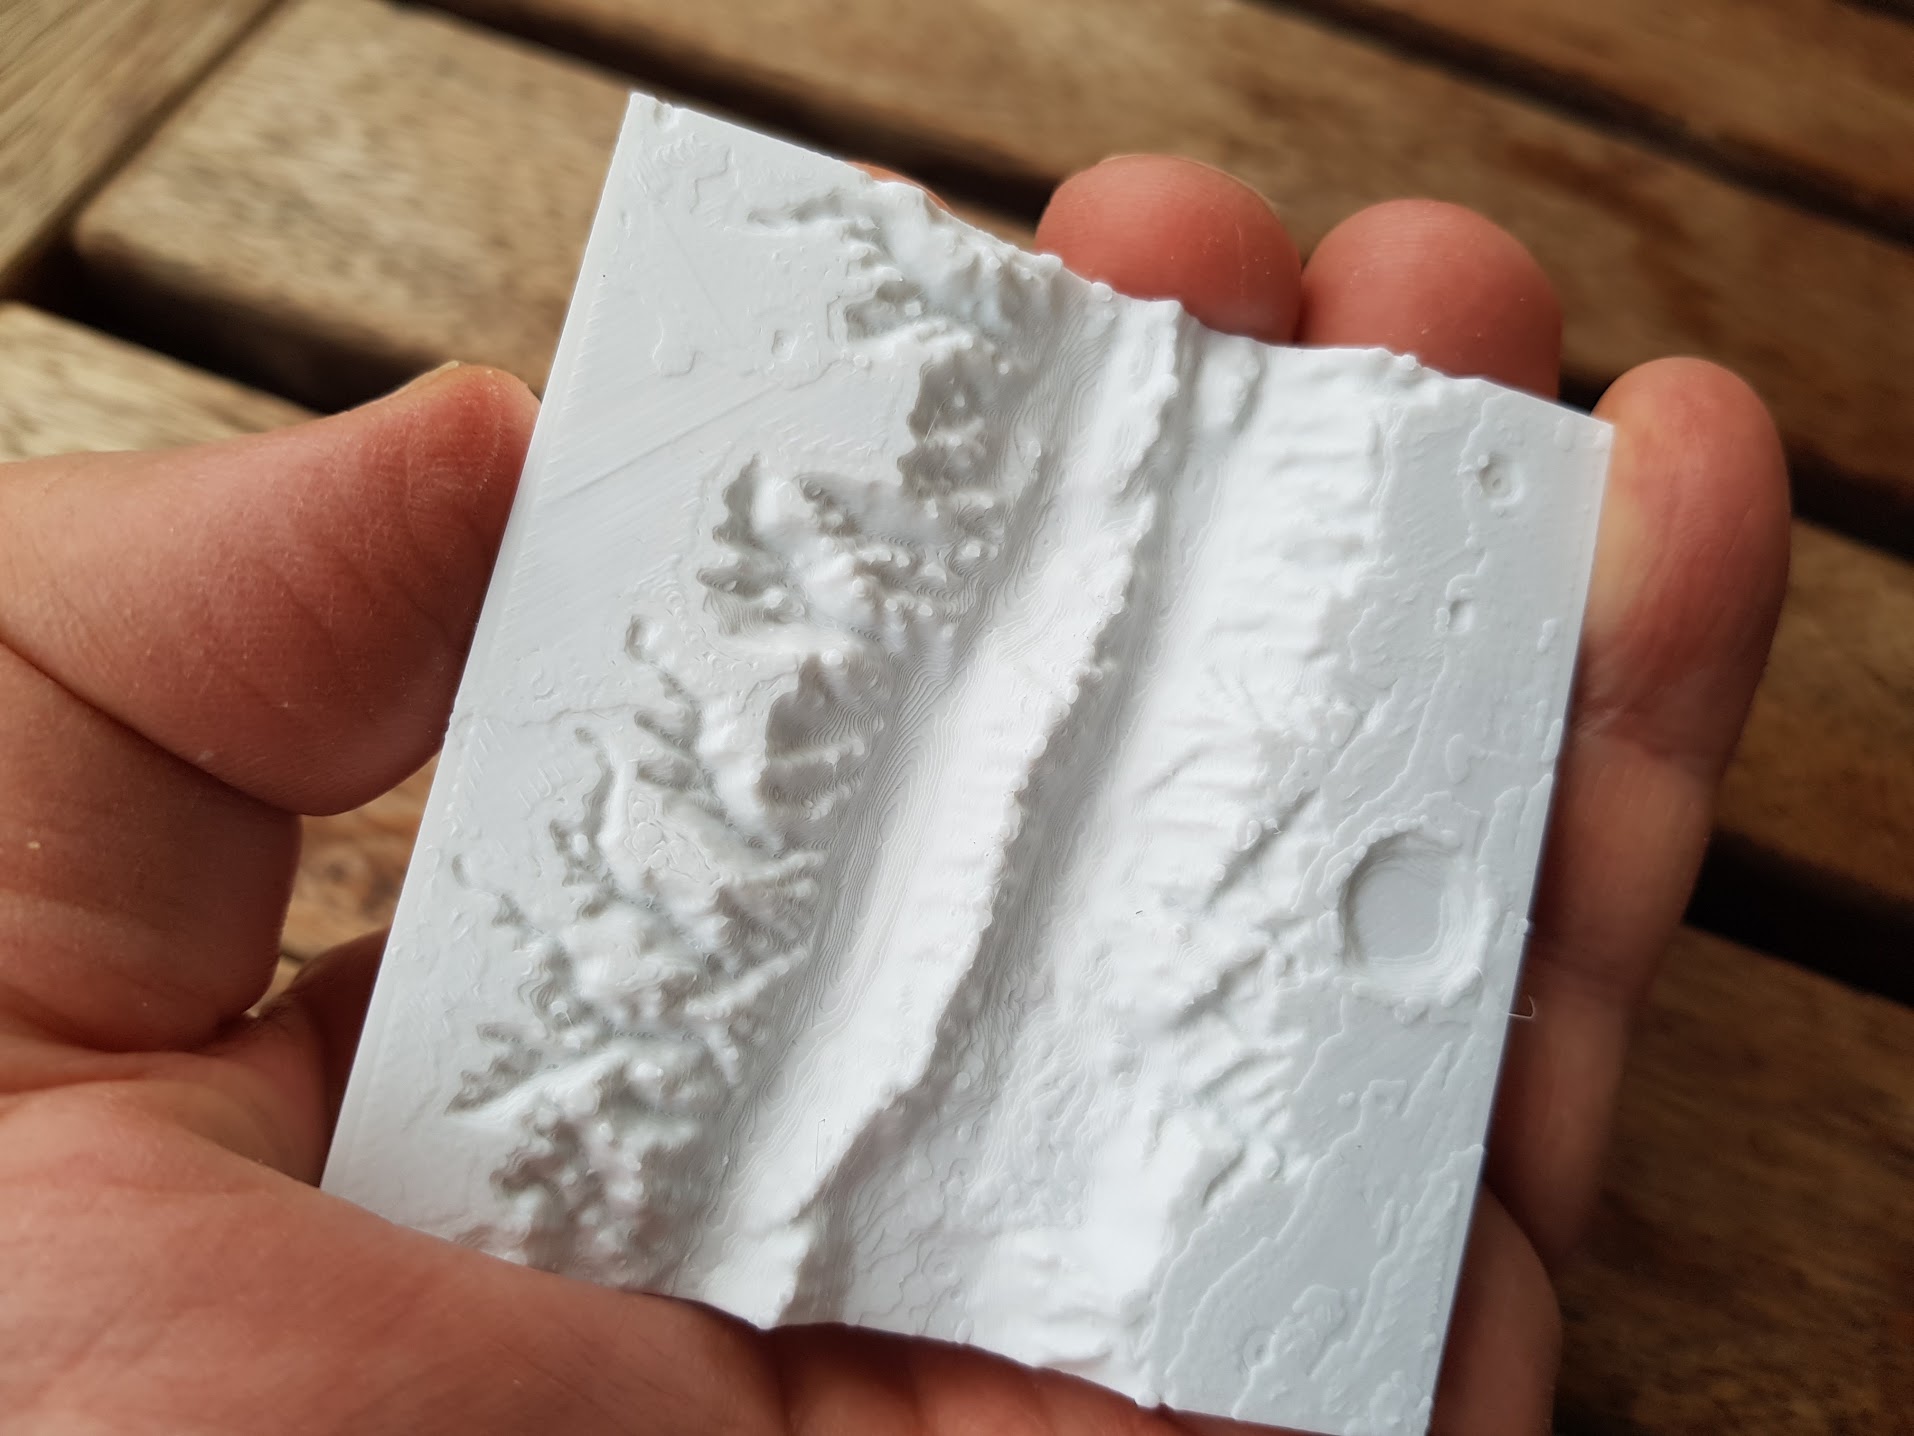
I wanted to document my Mars Garden in real time and post images online. There are many ways to do this of course, the best solution for you might well be to get a commercial web cam with appropriate software. I like to do things the hard way and am a bit of a maker geek anyway 🙂 and decided to go with parts I already had laying around. In this case, a Raspberry Pi Zero single board computer with a USB wifi adapter and camera module.
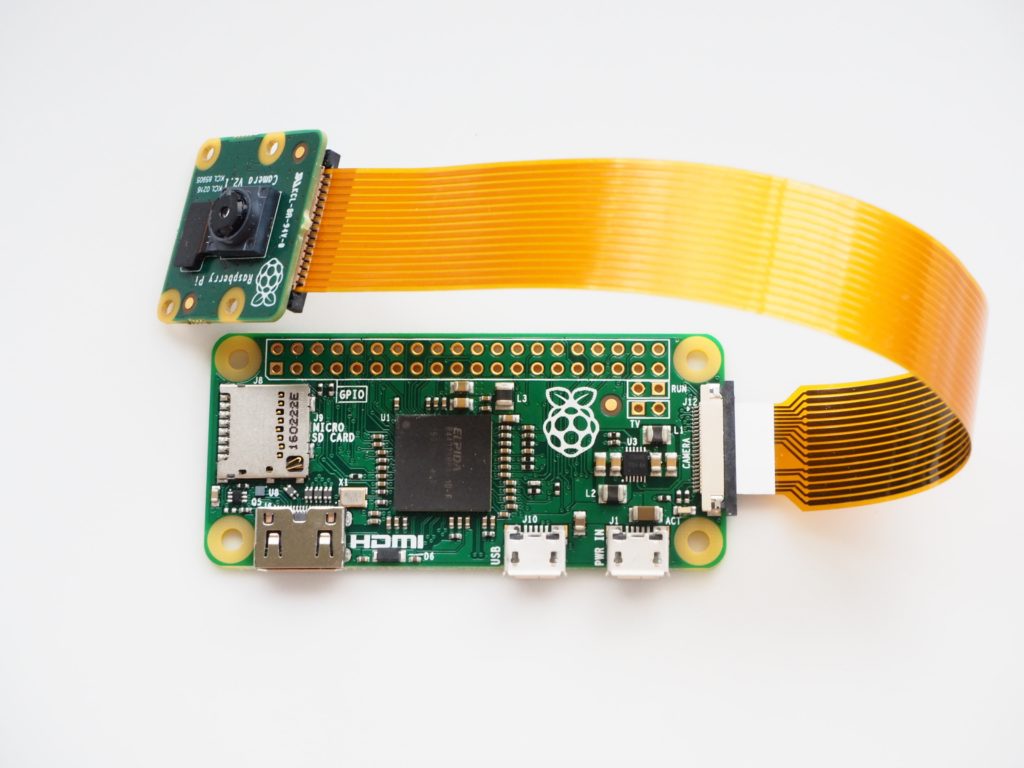
You can get a Zero with built-in wifi and a 5 megapixel camera module for about $35 (check out the Pi Hut for instance). Unless you have a micro-USB to USB converter and a micro HDMI to HDMI converter, you should also get Pi Hut’s Essentials kit. Well worth the extra money. Or you could use the Raspberry Pi 3 or any other (single board) computer with full size ports, of course.
Download and set up the Raspbian operating system
I’m using the Rasbian versjon of Debian Linux, but any kind of Linux will do (except for the camera command, more on that later). The Pi Zero is not a powerful computer, and as you will be using if for a single, simple purpose the small-footprint Rasbian Lite version is sufficient. It has everything you need, but dispenses with the graphical interface. From here on out it is command line only! The good news is that you’ll be fine with a 2GB Micro SD card, it really is that small.
Once you have downloaded and installed the OS (follow the link on the download page), insert the SD Card, connect the Zero to the screen and a keyboard and connect the micro USB power cord. After a minute or two the boot process you are presented with a blank screen and a $ prompt. You need to spend a few minutes setting the Pi up, and luckily the Raspberry people have included a very handy tool. Type sudo raspi-config and you will be presented with the menu below.
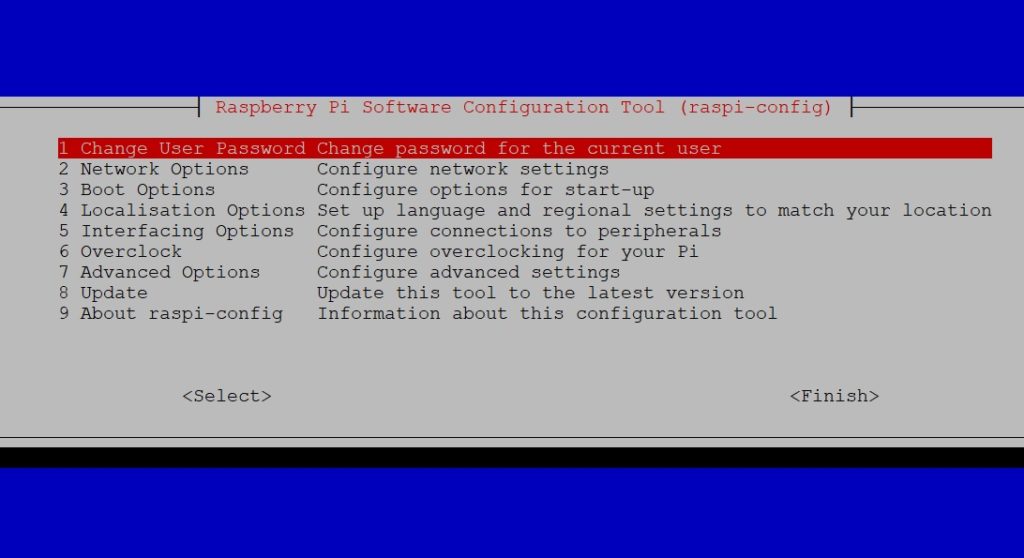
Work your way through the menu items using the arrow keys and TAB. Change your password in number 1, configure wifi in number 2, set up automatic login in 3 (B1/B2), configure local time and keyboard in 4, in 5 you enable your Pi camera (make sure to plug it in first) and SSH (very important for later), in 7 option A1 is usually recommended. When all settings are done navigate (using TAB) to Finish. Once you’re at the $ prompt again, type sudo reboot now to enable all new settings.
Make the ftp uploading script
To run an automated process in Linux you need a shell script. Basically this is a text file with the commands you want to run in the order you want to run them. To get your camera script started, think of a suitable name (say, ftp-upload.sh, where the .sh extension identifies it as a script). Rasbian comes with several text based editors, I prefer nano for its simplicity. Type nano ftp-upload.sh and you will see a screen more or less as below (in my case it’s a weird mix of English and Norwegian, but never mind, it’s easy anyway).
Now you need to type the following lines:
raspistill -o /home/pi/filename.jpg --annotate 12
curl -T /home/pi/filename.jpg ftp://ftp-host-machine//yourwebsite/folder/filename.jpg --user yourftpusername:yourpasswd
The first line tells the camera to take a picture and save it at the standard pi home directory, home/pi. Exchange filename for whatever you want. The annotate command adds a timestamp to your image, remove it if you don’t want it. The next line uploads the picture you just took to your website via the FTP protocol. Make sure to have a working username and password (who uses FTP anyway these days, right?). Note the double forward slash between the name of your provider’s ftp host address and your website’s address.
Now there is a much simpler way to do this if you use SSH. All you need is the Pi’s IP address on your home network, you can find this by typing ifconfig and look for the number (probably starting with 192.168…) after wlan0. Enter this number into your SSH client, log on with your username and password and you have full access the Pi. This is by far the best way to run a Pi in «headless» mode, that is without access to screen or keyboard.

PuTTY is the recommended SSH client for Windows, on a Mac you can use the built ssh client in the terminal window. A nice feature in PuTTY is the ability to copy and paste from Windows to the Pi. Copy as usual in Windows, then move the mouse pointer to PuTTY and paste by right clicking the mouse. Make the appropriate changes to the command lines and save them by pressing CTRL-X and choosing Y. Before you can run the file as a script, you have to give it shell permissions by typing chown x ftp-upload.sh . Type ./ftp-upload.sh and your commands will run, one after another. Keep an eye on the screen for any error messages.
If you want to store all your images, you need to give each a unique name. You could store these files on the Pi but I advise against it. Writing and rewriting data to micro SD cards can corrupt them after a while, sometimes beyond repair. Having lost my share of cards I’ve learned my lesson: Keep the number of write operations to a minimum, and store files on a USB stick or online. The following line uploads the same file with date and time added to the name.
curl -T /home/pi/filename.jpg ftp://ftp-host-machine//yourwebsite/folder/filename-$(date '+%F-%T').jpg --user yourftpusername:yourpasswd
Automate the procedure with crontab
The simplest way to automate tasks in Linux is to enter your commands in the crontab file. type crontab -e, and you will see the window below. First time you type the command you are asked to choose editor, I went for nano again so the commands are the same as above – arrow keys to move around, CTRL-X and Y to save the file. The structure of a crontab line is simple. From left to right we have the minutes in every hour, the hour (0-23), date in a month, month number (1-12), day of week (1-7) and the command you want to run.
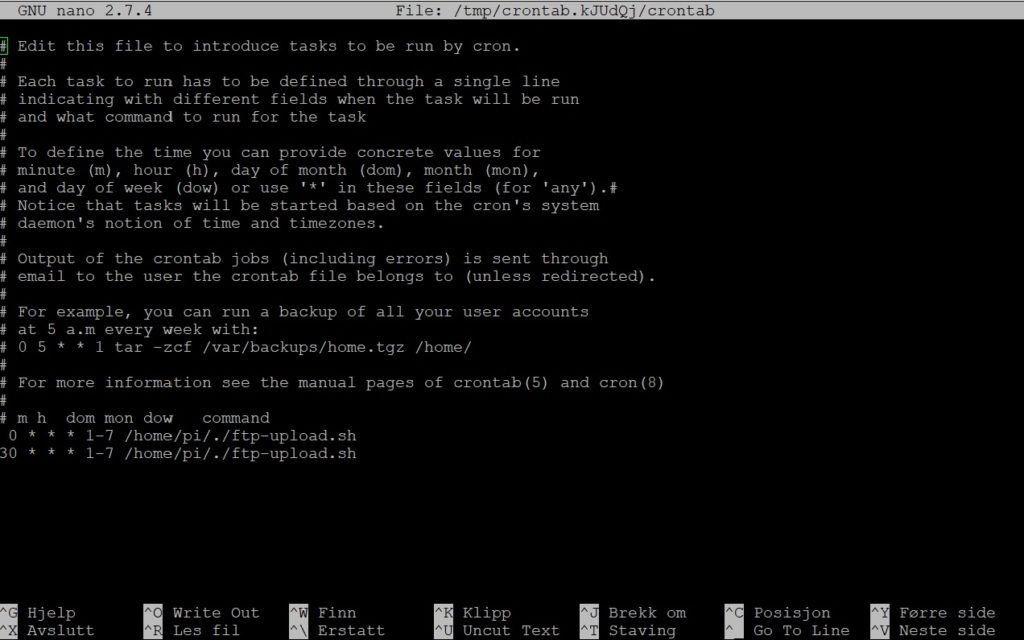
The # stops crontab from reading the line, and is usually reserved for comments as above. The first uncommented line is
0 * * * 1-7 /home/pi/./ftp-upload.sh
This means that our upload command will be run at 0 minutes (on the dot) every hour (that’s what the * means), every day of the month, every month of the year and every day of the week. The line below means that a picture will also be 30 minutes past the hour.
Type CTRL-X, Y to save and you are good to go. Close down the system with sudo shutdown now, unplug the power and the next time you power up the camera will automatically snap pictures and upload them.
Adjusting the focus on the Raspberry Pi Camera
By default the camera module is set to focus on objects further away than half a metre, which makes for an excellent surveillance camera. To get a clear picture of your Mars plants, you’ll need a focus distance between 5 and 10 cm (2-4 inches). The Pi lens is actually capable of this: Look closesly at the lens assembly and you will see that it is threaded. The lens is glued in a fixed position at the factory, but it usally takes very little force to twist it loose.
Using only my fingers and nails, I twisted the lens a few turns to the left and got the close focus I wanted. I checked the focus by booting up the Raspberry while connected to a screen and keyboard. When you type raspistill -o test.jpg, the image will flash on the screen for a few seconds, allowing you to check your focus. Or you could run the script you created via SSH and check the uploaded image on the web. With Linux, there’s always another solution. 🙂
External links
The Pi Hut
The Raspbian Operating System
How create a Lightweight Raspberry Pi System
Download PuTTY
Want to upload to Dropbox instead? I’ve tried this and it worked for me, but it is fiddly
Hej Eirik
Jag har installerat allt på en Raspi 3B+ och Rasberian nyest variant. Men ledsen fungera det inte.
raspistill -o /home/pi/Desktop/image.jpg
fungera utmärkt men inte med scripten jag ha tagit från Din beskrivning. Jag få ingen felmeddelande.
Ha Du ett idé ?
Mvh
Jörg i Sverige
Har delvis följt guiden och fått det att fungera. Partly followed the guide and got it to work.
Hi Eirik
This is a very helpful article and almost exactly what I am looking for. Maybe you could please give me some advice. Would you know if there is a way to copy/save the files to a local drive on my computer rather than to an online site such as a website. I am planning using a Pi Zero W configured as a dashcam https://bitsnblobs.com/making-a-dashcam-using-the-pi-zero-pt-1/ to watch my garden. Rather than manually copying the files everyday via SSH or VNC it would be very useful if this was an automatic process.
Hope you can help
Best regards
Mike
Hi man
I want to do exactly what you did, but with raspberry pi 4 and the camera module I have. I want the pii to push the picture to a folder on my pc (windows os) after it been taken via ftp automatically. What do I need to set up on my pc in order to make it work? And how should I connect the pii to the folder on my pc?